Creating master pages
In addition to using the default Document Master in your publication, you can create a master page from scratch, or create a master based on an existing master or publication page. If you plan to have several master pages that share one or more design attributes – such as position and formatting of page numbers, you can save time by designing the Document Master page or spread, and then basing additional masters on the Document Master, rather than creating each new masterfrom scratch.
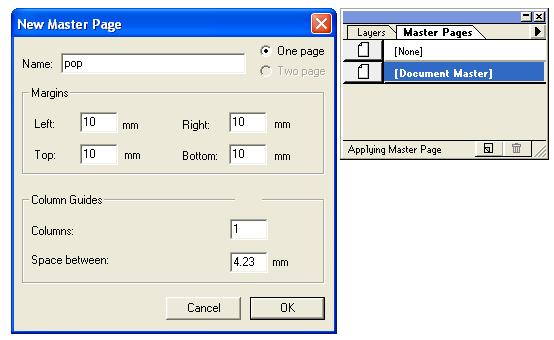
To make a new master page you have to follow the following few steps:
1.Choose Window > Show Master Pages.

2. Choose New Master Page from the Master Pages palette meny, or click the new master button at the bottom of the palette.


3. Type a name for the master and specify whether you want a single page or a two-page spread.
3a. If your publication is single-sided, you do not have the option of creating a spread.

4. Specify the margins, number of columns and space between the columns.
4a. If you are creating a two-page master spread, be sure to specify columns and the distance between them for both left and right hand pages in the spread.
5. Click OK.
Applying the Same Master to Several Pages throughout a Publication (PageMaker)
How to apply the same master to several pages throughout a publication?
The answer for this question is the following few steps:
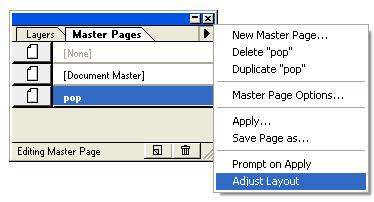
1.Choose Window > Show Master Pages.
2. Choose Apply from the Master Pages palette menu.
3. Type a range of pages to change.
3(a) If appropriate use the Page Range text boxes to type a contiguous range (use a hyphen to separate the first and last page numbers in the range- as in 3-6_, a discontiguous range (use commas to separate the numbers – as in 2,5,8) or a combination of both. For example - typing “2,4-7,11” applies the specified master to pages 1,3,5 and all subsequent pages in that publication.
4. Select Adjust Layout if you want objects and guides on the specified pages to be repositioned or resized as appropriate for the margins and columns of the master you are about to apply.
5. Click Apply.
These following figures will help you to understand it clearly:


No comments:
Post a Comment