Saturday 1 September 2018

Shadow Boxes - PageMaker

Shadow Boxes:

shadow box, such as the one shown below, 
 

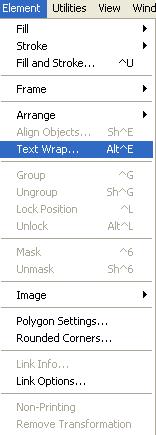
is actually made up of two boxes – the one in the front contains the text, and the box in the back has a solid fill. You can either manually draw two boxes or you can draw one box and copy it with the clipboard. The second process may actually be a better one, as this results in the boxes having the same size. To start with, draw a box with a paper fill. Copy this box to the Clipboard and then paste it. It is now on top of the first box, slightly offset to the right and down. Fill the second box, that is the one on top, with a solid black (for more details on Fill and Strokes click  Using Strokes and Fills in PageMaker). If necessary, reposition the second box and send it behind the first one. You can now group these items, using the command, Element > Group 


or by simply using keyboard shortcut Ctrl + G, after selecting the two boxes and the text object, using the Pointer Tool from the Tool Box, so that they do not move independent of each other.

Using Character Map Accessory and Changing the Stacking Order of Objects in PageMaker

Using Character Map Accessory:

Windows comes with an accessory calledCharacter Map that lets you insert specialcharacters. Most of these characters will be from symbol fonts, such as Singwinds, Symbol and Zapf Dingbats. Under Windows, click the Start button > Programme > Accessories > System Tools >Character Map. From the Font list, select the desired font. Click the symbol you want. Choose theSelect button, and then click the Copy command to place the character on the Clipboard. Close or minimize Character Map and return to PageMaker. Paste the symbol in the desired location.


Changing the Stacking Order of Objects:


Whenever you draw an object that overlaps another object, the last one drawn is placed on top. This stacking effect can cause some objects to seemingly disappear. To stacking order of the object can be changed. To do this,select it and choose one of the Bring or Sendoptions on the Element > Arrange Menu.


Bring to Front places the object on the top of the stack, while Send to Backplaces it on the bottom. To move an object one layer at a time, use the Bring Forward or Send Backward commands. Each of these has keyboard shortcuts:

Thursday 30 August 2018

Moving the Cursor in PageMaker

Moving the Cursor:

To position the I – beam, move it to where you want to begin entering text and click the left mouse button. You will see a blinking vertical bar, called the Insertion points. The location of the insertion point indicates where text will appear when you type. Once you have an insertion point, you can slide the mouse to move the I -beam out of the way.


When you click inside the margin guides, the cursor appears just to the right of the left margin guide, regardless of where you clicked. To move the cursor in existing text, you can use the keyboard. The arrow keys move the cursor (not the I -beam) one character or line at a time.


Creating Table & Sorting Pages In PageMaker

There is no concept of tables native in PageMaker, except for the buggy Adobe Table that is included with PageMaker. You can make tables with the line drawing tools and rule above and below paragraph settings, but you must be patient to do this. You will also need to get familiar with Indents and Tabs (CTRL+I) to make PageMaker native tables. Combined with the line tooland rule above and below paragraphs, you can make some good tables.

Having said all that, about the best practices with PageMaker, there is another way if you are on Windows. You can copy and paste tables you make in Microsoft Word to PageMaker. 

Here is the secret:
1.) Make a table of your choice in Word, Select or Copy the whole table, and nothing but the table.


2.) Switch to your PageMaker document. Choose Paste Special from the Edit menu. Choose Enhanced Metafile.


You should now have a nice table.


It usually works, but some service bureaus and printers have trouble with it. I have never had any problems, but I have pretty good luck in these matters.
But there is another and much easier way of making a table with all its contents, that is just by using Edit > Insert Object command.

Follow these steps:
1.Go to ‘Edit’ Menu option in PageMaker and click ‘Insert object’.


2. This will open the ‘Insert Object’ dialog box.


3. Choose ‘Microsoft Word’ from the Object Type option.


4. This will open Microsoft Word-here you create your table along with its content.

5. Simply select the File > Update command or ‘Ctr + S’ key from Microsoft Word.


6. This will automatically import your Word table to PageMaker document.

Sorting Pages:

The Layout > Sort Pages command is a very handytool that provides you with instant thumbnails of all the pages in your publication. It also accurately depicts double sided documents, and even provides an adequate account of a document.


But the main attraction of the Sort Pages command is that it will quickly move pages, and all elements, to different places in a publication. As with inserting and removing pages, resorting pages changes the flow of a multipage text file.

Sorting pages is a matter of clicking and dragging. You select the page to move by clicking it; for multiple pages, hold down Shift as you click each one. Once selected, drag any of the selected pages to the desired new location. If your publication is double sided, then PageMaker shows you pages in pairs and treats its page spread as a single entity. When you reorder pages, the thumbnails of each page are resorted, and the original page number, with dotted lines around it, is shown next to the new page number.

Using Wrapping Text in PageMaker

Wrapping Text around Graphics:

One of the best ways to create visual impact in a publication is to wrap text around graphics.

To Wrap Text around a Graphics:

1.Select a graphic or image.

2. Choose Element > Text Wrap.


3. Click the Wrap Option according to your graphic or image you are working with.

4. Specify a Text Flow option.

4a. The leftmost Text Flow icon jumps text over a graphic and continues the text on the next page or column.


4b. The middle icon allows text to jump over a graphic and continue on the same page. 


4c. The rightmost icon creates a rectangular text wrap around all sides of a graphic.


5. Enter standoff values for the boundary. The standoff values determine the distance of the text from each side of the graphic.


6. Select Wrap Text on Same Layer Only if you want text on other layers to ignore the text wrap boundary.

7. Click OK.

Here is an example of Text Wrap:
Fig1


Fig 2

Creating Frames in PageMaker

Creating Frames in PageMaker 


Frames:
PageMaker 7.0 includes a special kind of object called a frame. While a frame behaves in many ways like any other PageMaker graphic object (for example – a frame can have stroke and fill attributes), a frame differs in two important ways:
1.A frame can hold content – either text or graphics – or serve as a placeholder for content.
2. One text frame can be threaded to other text frames so that a single story can flow through multiple frames.
In general, you’ll want to use frames as placeholders for content in structured documents such as newspapers or newsletters.

Advantages of Frames:
By drawing empty frames as placeholders and threading text frames together, you create a template in which the layout and structure of the publication is set and content is easily poured into assigned spaces.

Creating a Frame:

1.To create a frame you use the  tools in the toolbox. 


Note:  If you add a frame to a master page, its border and content appears on each publication page to which the master is applied – you cannot, from a publication page, add content to a frame placed on a master 
page.

2. Create or select a PageMaker shape.


3. Choose Element > Frame > Change to Frame. The shape preserves its fill, line weight and other object attributes.

Using Strokes and Fills in PageMaker

Strokes and Fills:
You can modify objects a number of ways in PageMaker (resize, rotate and add color to objects). For objects drawn with PageMaker drawing tools, you can also change stroke (the width of lines drawn with the drawing tools and the width of borders around rectangles, ellipsesand polygons), as well as stroke and fill patterns. If you select stroke of fill attributeswhen no object is selected, those attributesbecome the new default settings. Objects you subsequently draw adopt those attributes until you change them.

You can use, apply or change fill and stroke in these following ways:
1.Using the Pointer Tool, select an object.


2. Use one of the following methods:
2a. To set both the fill pattern and stroke attributes for the selection, choose Element > Fill and Stroke, and select attributes from the Fill and Stroke pop-upmenus.


2b. To change only the fill pattern or stroke attributes, choose Element > Fill or Element > Stroke and select attributes.


2c. If the stroke size you want is not listed on the Stroke menus, choose Element > Stroke > Custom to specify a weight from 0 – 800 points in 0.1 increments.


3. Choose any additional attributes for strokes:
3a. Choose the Transparent Background option if you want objects placed behind a patterned stroke to show through the spaces in the pattern.


3b. Click the Reverse Stroke option to draw a paper-colored stroke or outline of a shape on a contrasting black, shaded or colored background.


Checking Spelling in PageMaker

Checking Spelling:
You can check the spelling in a selected range of text, in all text in the active story, in all stories in a publication or in all stories in all open publications. PageMaker highlights misspelled or unknown words, words typed twice (such as the the), and words with possible capitalization errors.
At least one dictionary is installed automatically with PageMaker. Depending on the language version of PageMaker, more than one dictionary may be available to install. You can use custom installation options to choose from up to 17 languagedictionaries to work with.

To Check Spelling:

1.Click an insertion point in a particular story or select a rang of text.

2. Choose Edit > Edit Story.


3. In story editor, choose Utilities > Spelling.


4. Specify options:
4a. Alternate Spelling lets you see suggested replacements for possible misspelled words.


4b. Show duplicates lets you detect duplicate words, such as 'the the'.


4c. You can deselect these options to speed up the spell check.

5. Click Start to begin checking spelling.

6. As PageMaker finds unfamiliar words and other possible errors, choose from the following options:

6a. Click Ignore to continue checking spelling without changing text.


6b. Select a word in the Change to list, and then click Replace.


6c. Click Add to have PageMaker store the unrecognized word in the user dictionary so that subsequent occurrences are not flagged as misspellings.